How to create LV with Visual LVM : simple/spanning - Manage LVM with Visual LVM, from 0 to ∞ (12)
Section 4 : The Logical Volume operations
Author : weLees
Contents and compilations published on this website by the providers are subject to international copyright laws. Reproduction, editing, distribution as well as the use of any kind outside the scope of the copyright law require written permission of the author or weLees.
After many lessons, we finally began to face the most immediate request of users: Creating Logical Volume. In LVM system, a Logical Volume is an object directly used by user. The Logical Volume provides user a virtual storage space by using space in the host device and hides the implementation details. For the user, it is just a linear volume, just like any other volume.
For storage administrators, it provides various features by different configurations, such as:
High performance access
High security access
Performance/security balanced access
Data security sharing
Flexible user space
And so on...
Section 4.1 Create Logical Volume
The creating Logical Volume is the most complicated operation of LVM administration because of there are multiple configurations for different purposes.
To create Logical Volume, you need select LV Operation -> Create in navgating bar to start renameing wizard, no item selecting here, you need to select in wizard.
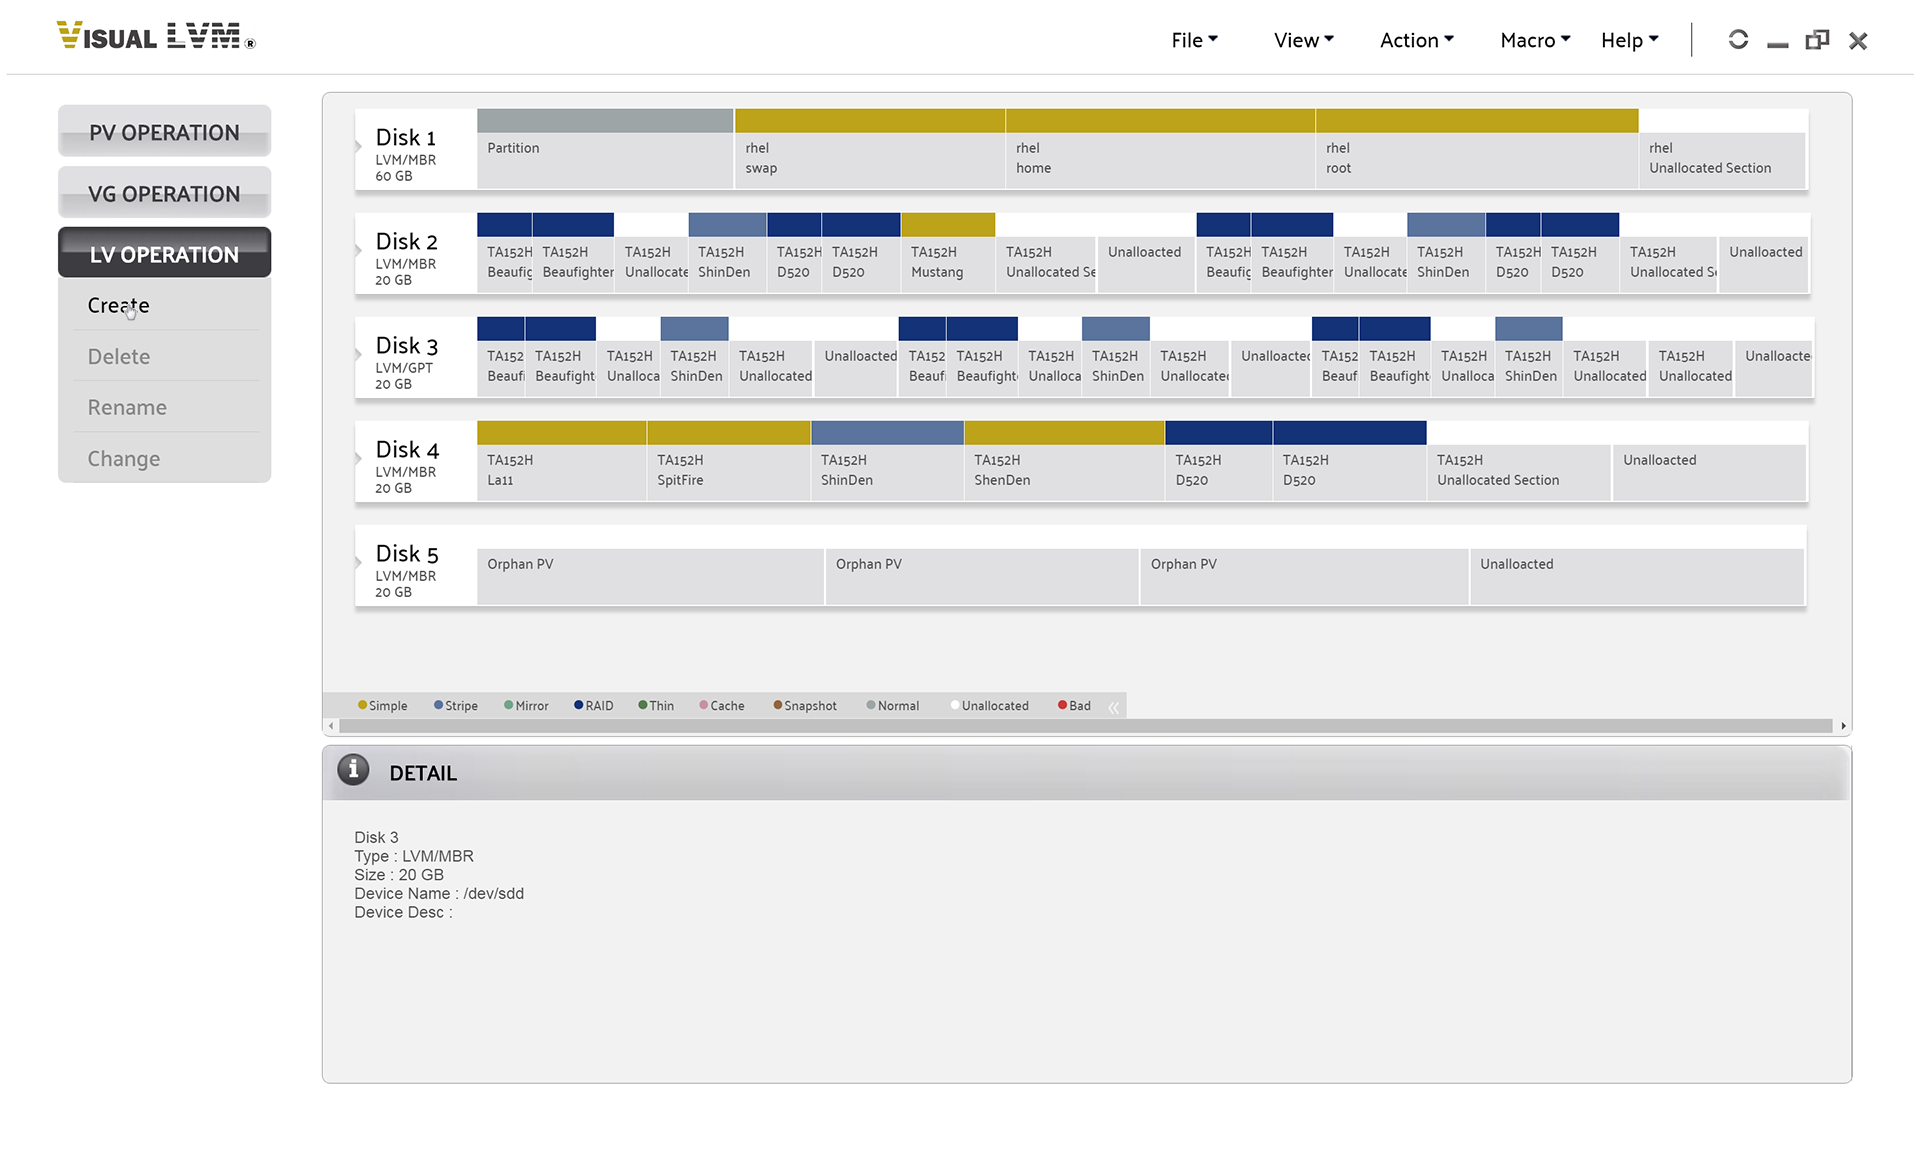
Select LV Operation->Create to start creating Volume Group wizard
The creating Logical Volume is one of the most complicated wizard. It combines by 3 parts.
1. Storage view : to select space for volume
2. Physical Volume list : to manage Physical Volume for volume
3. Type & Base setting : to select the format of Logical Volume & some base settings
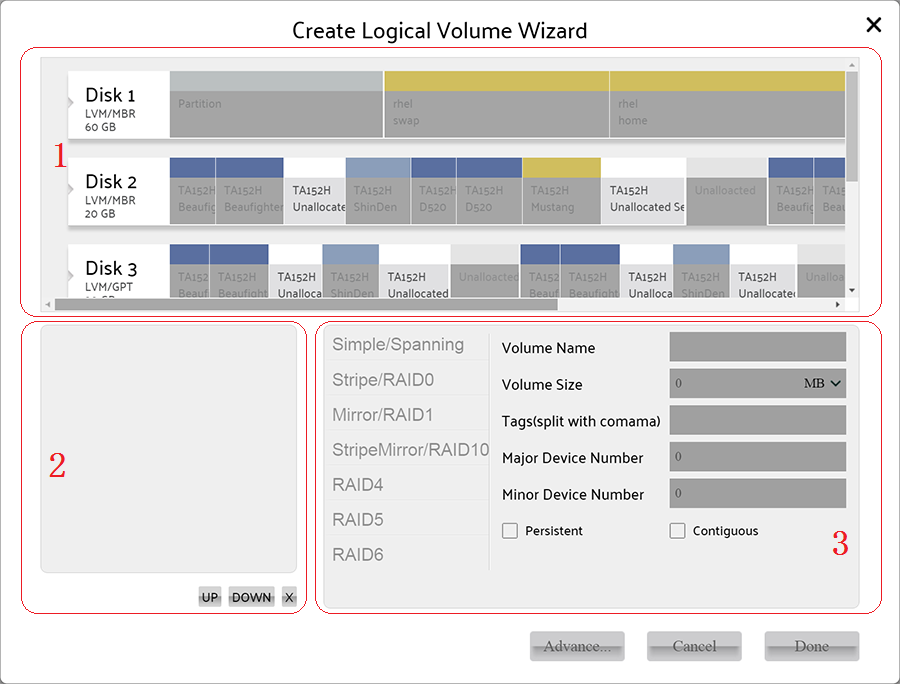
Creating Logical Volume wizard
To set more detail parameters you need to open Advanced wizard by press Advance... button, and the advanced setting for different format is different.
The Visual LVM Standard MKI support 7 formats : Simple/Spinning, Stripe/RAID0, Mirror/RAID1, StripeMirror/RAID10, RAID4, RAID5, RAID6.
Let's talk about them one by one.
Section 4.1.1 Create Logical Volume - Simple/Spanning
The Simple/Spanning is the simplest and most common format of Logical Volume formats. It is a linear combination of one or more free spare storage sections. A simple format that contains only one section, and a spanning format that has multiple sections. It is possible with this format to combine storage space which resides on multiple storage devices to one single volume, which allows user to easily expands volume without migrating data. To expand volume with traditional solution, user has to create one/multiple new volume in new device and change storage organzation to fit new added volume(s), and migrating data maybe. With LVM, these are not problem any more.
To create simple/spanning volume, you need to select at least one spare section in any Physical Volume which belongs to certain Volume Group. And the format selecting bar will be enabled.
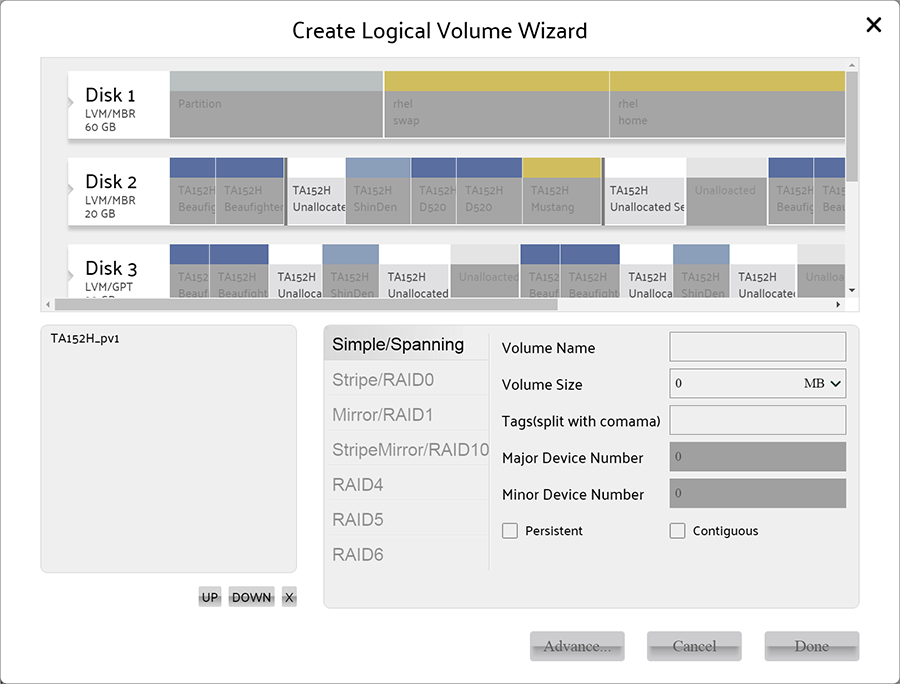
select spare section for create simple/spanning volume
Here we need to pay attention to storage view. User can click on spare section in Physical Volume to select or remove the Physical Volume for creating Logical Volume, the resize bar will show and flash on all spare sections in selected Physical Volume, unless Contigious option was selected -- with Contiguous option, only clicked section can be use for continuous volume allocation. It means section(s) with resize bar can be used. User can drag resize bar to change size of volume. And you can click on it to cancel selecting.

Flashing bar for resizing
Now you can drag on any section for setting the size of volume, of course you can input it, and the Visual LVM will select certain section(s) to fit your request.
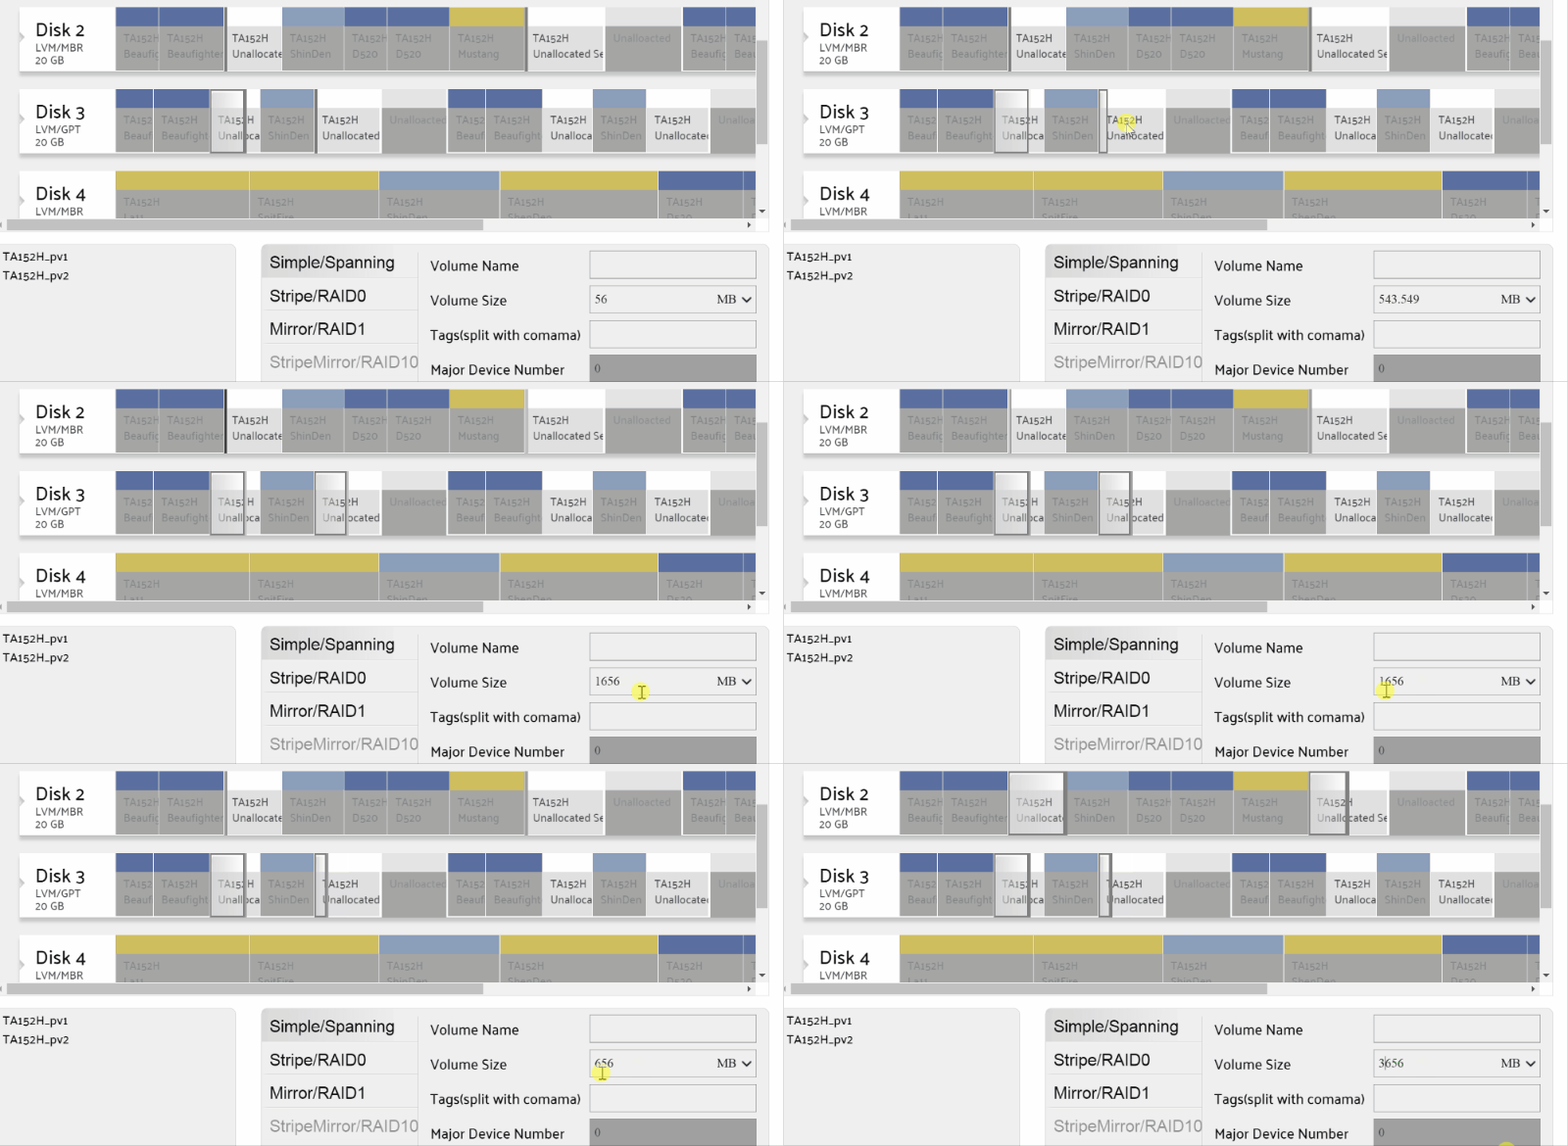
Set size of volume
All selected Physical Volumes shows in the Physical Volume list, user can change the order for special purpose or remove it by click Up / Down / X button.
The name of volume must be in 'a'-'z','A'-'Z','0'-'9','-','_'. And the same to tag.
The Major Device Number/Minor Device Number configurations are bind with persistent option, they are used for specify fixed device number for permanent access, and be available only when persistent is selected.
When the Contigious option was selected, there could be only one section in volume(usually for performance purpose), the only section could be used by the user for volume while clicked(single selection).
And you can press Advance... button to change default settings of Logical Volume.
Usually user need not to change the default advance settings of Logical Volume.
Here we can set followed parameters:
1. Read ahead size : For performance, the parameter is used to determine how much data will be read in a single read operation.
2. Activate volume : Whether the volume will be activated for using after it was created. The default option is yes.
3. Read only : Whether the volume is read-only, it usually used for sharing resource.
4. Clear header : Whether the header section of volume will be erased to avoid user data leaking.
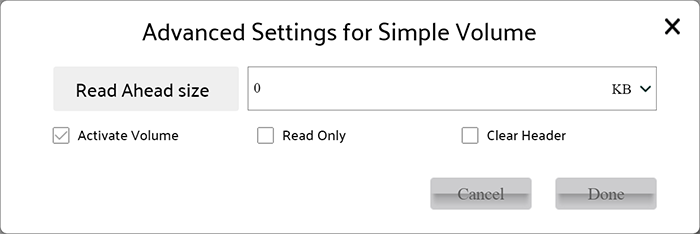
Advanced settings of Logical Volume
When all settings finished, press Done button on creating Logical Volume wizard to perform operation.
After operation finished, Visual LVM shows follow dialog to inform user that Logical Volume has been created.
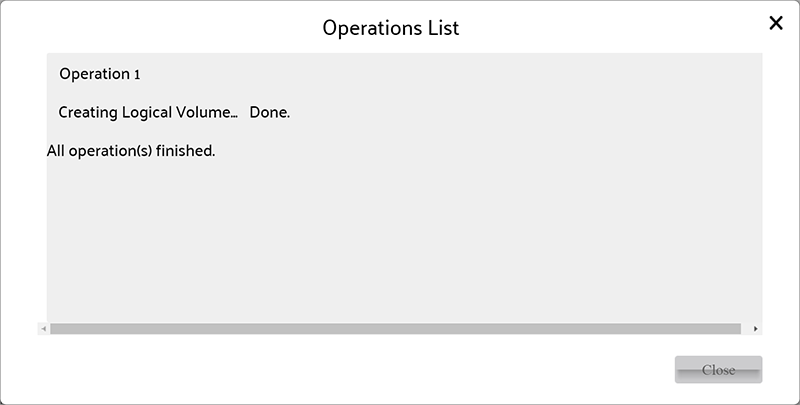
Logical Volume created